Discover a quick and safe method for removing a tire from a rim. Our guide provides easy steps to ensure a hassle-free process. Drive with confidence!
If you need to remove a tire from its rim, it’s crucial to have the right tools and techniques at your disposal. This task, commonly performed during tire changes or when repairing a flat, requires precision to avoid any damage to the tire or rim.
A well-orchestrated approach involves deflating the tire, breaking the bead— which is the edge of the tire that sits tightly on the rim—and carefully leveraging the tire over the rim with the aid of tire irons or spoons. Ensuring safety and efficiency during this process not only helps maintain the integrity of the wheel components but also prepares the tire for its next use or proper disposal. Whether you’re an avid DIY enthusiast or simply looking to understand the fundamentals of tire maintenance, mastering the technique of removing a tire from a rim is an invaluable skill.
Essential Tools For Tire Removal
Swapping a tire from a rim is a task anyone can tackle. Essential tools make the job smooth and safe. This guide outlines all you need to successfully remove a tire, whether in your garage or driveway.
Basic Toolset Requirements
A proper toolset is crucial for smooth tire removal. Your basic kit should include:
- Tire iron or a spoon to pry the tire off
- Valve core tool for air release
- Bead breaker to loosen the tire from the rim
For tough tires, a bead blaster can be magic. Lubricant helps slip the tire off without damage. Optional but helpful, a tire changer can save time and energy.
Safety Gear And Precautions
Before working on a tire, always think safety. Here’s what you should use:
- Heavy-duty gloves to protect your hands
- Safety glasses to keep your eyes safe
Ensure the workspace is well-lit and secure. Never rush the process, as patience ensures safety. A tire can be heavy and awkward, so smart lifting avoids injury. Trust your gear, follow these steps, and the tire will come off in no time.
Preparing Your Workspace
Starting with a well-prepared workspace is key to successfully removing a tire from its rim. It helps prevent injuries and makes the process smoother. Follow these steps to set up the right environment and organize your tools before you begin.
Choosing The Right Environment
Choose a flat, clean, and well-lit area to work in. Ensure the space is free of clutter. This makes the removing process safer and easier to manage. An ideal environment could be your garage or driveway.
- Flat surface to prevent the wheel from rolling.
- Ample lighting so you can see what you are doing.
- Spacious area to move around freely.
Organizing Your Equipment
Gather all the tools you’ll need before you start. This will save time and avoid frustration during the process.
Layout the tools so they are easily accessible:
- Tire Iron or Pry Bar
- Valve Stem Removal tool
- Lubricant
- Air Compressor (if available)
- Protective Gloves
| Tool | Use |
|---|---|
| Tire Iron | To pry the tire off the rim. |
| Valve Stem Tool | For removing the valve stem and deflating the tire. |
| Lubricant | To ease the removal of the tire. |
Remember to wear protective gloves to keep your hands safe. Double-check that you have everything needed before beginning.
Removing The Tire From The Vehicle
Before a tire can leave its rim, it must come off the vehicle. Equipped with the right tools and techniques, anyone can do this safely. Follow these key steps to ensure a smooth process.
Loosening Lug Nuts: Pro Tips
The first step is loosening the lug nuts. They keep your tire fixed to the wheel hub. Use a lug wrench for this task. Turn counterclockwise to loosen but do not remove them completely while the wheel is on the ground.
- Use penetrating oil if lug nuts are rusty.
- Position the wrench for maximum leverage.
- Apply firm, steady pressure to the wrench.
- Loosen in a star pattern to keep pressure even.
Safely Lifting The Vehicle
Lifting the vehicle is crucial to remove the tire. Never skip safety measures.
- Use a sturdy jack. Place it under the vehicle’s designated lift point.
- Consult the owner’s manual for precise lift points.
- Ensure the jack stands ready to bear the weight.
- Raise the vehicle slowly until the tire clears the ground.
Once the vehicle is safely lifted, remove the lug nuts completely. Take the tire off the wheel hub. Congratulations, you’re ready for the next step!
Detaching The Tire From The Rim
When it comes to automotive DIY, detaching a tire from the rim is a skill every enthusiast should know. It can save time and money, allowing tire change and repair right at home. It is essential to do it correctly to avoid damage to the tire and rim. This guide simplifies the process into easy-to-follow steps.
Breaking The Bead Effectively
The first step is to break the tire bead. The bead is the edge of the tire that sits firmly against the rim. Before starting, make sure the tire is fully deflated. Breaking the bead requires care and the right technique.
- Place the tire flat on a solid surface.
- Use a bead breaker tool or a heavy object like a wooden plank and mallet.
- Apply firm pressure to the edge of the tire.
- Move around the tire’s circumference until the bead is loose.
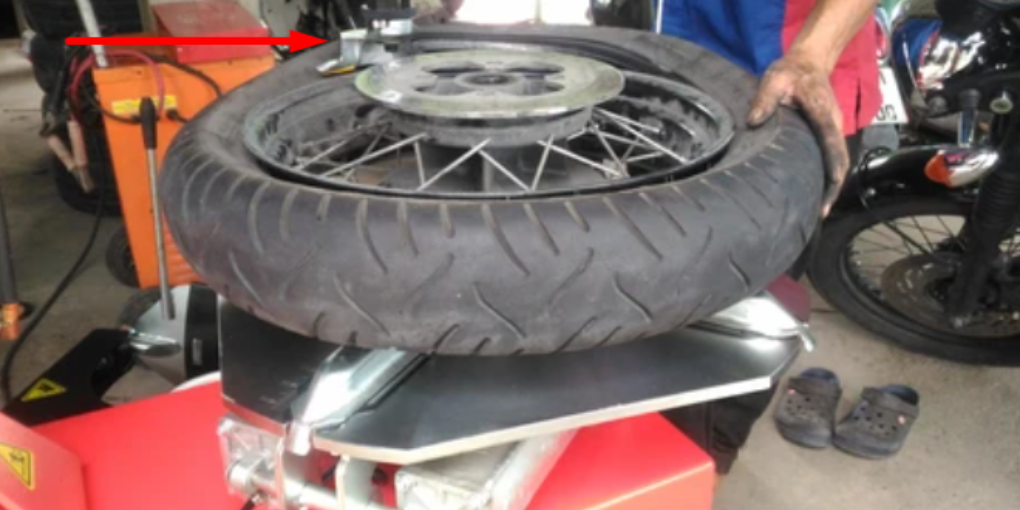
Lever Techniques And Rim Protection
With the bead broken, you’ll now use lever techniques to pry the tire off the rim. Protecting your rim is crucial to prevent scratches or bends.
- Insert tire levers between the tire and the rim.
- Apply even pressure down on the lever.
- Gently work the lever around the tire’s edge.
- Ensure the rim has rim protectors in place to avoid damage.
- Once one side is off, repeat on the opposite side.
Follow these instructions with care. Your tire will be free from the rim without any damage. Now, you can install a new tire or repair the old one. DIY tire changing becomes a breeze with practice.
Finishing Steps And Disposal
Once a tire comes off the rim, final tasks await. This stage ensures safety and environmental responsibility. Simple steps lead to successful completion. Understanding how to handle the used tire proves essential.
Inspection And Cleanup
Begin with a thorough inspection. Check the rim for any damage. Look for bends or cracks. Ensure the rim is in good condition for future use.
Clean the rim meticulously. Remove any old sealant, dirt, or debris. Use a mild soap and a soft brush. Rinse it thoroughly and dry completely to prevent rust.
Proper Disposal Of Old Tires
Disposing of an old tire correctly is critical. Tires are not biodegradable. They take up space in landfills. Some areas have specific rules for tire disposal.
- Locate a local tire recycling center.
- Consider responsible recycling options.
- Some facilities repurpose tires into rubber mulch or asphalt.
As a last resort, reach out to a professional tire disposal service. They have expertise in eco-friendly tire disposal.
Troubleshooting Common Issues
Let’s tackle some issues you may face while separating a tire from a rim. From beads that won’t budge to avoiding scratches or damage, we’ve got the solutions.
Dealing With Stubborn Beads
Challenging bead removal is a common headache. Below are tips for easing the process:
- Lubrication: Apply soapy water around the bead. It loosens the grip.
- Bead Breaker: Use a bead breaker tool. Ensure it’s firmly against the tire to avoid slippage.
- Persistence: Stubborn beads may need multiple attempts. Keep consistent pressure.
Avoiding Damage To Rim And Tire
To ensure both tire and rim stay unharmed, follow these steps:
- Gentle tools: Use plastic or rubber-coated tools. They prevent rim scrapes.
- Steady hands: Work slowly and with care. Rushing increases risk.
- Alignment: Keep the tire aligned with the rim as you pry. It reduces strain.
Remember, always wear safety gear and refer to the manual for specifics on your tire and rim.
Frequently Asked Questions On How To Remove A Tire From A Rim
Can I Remove A Tire From The Rim At Home?
Yes, you can remove a tire from the rim at home by using tire irons, lubricants, and following proper safety measures. Ensure you have enough space to work and consult a guide or video for step-by-step instructions.
What Tools Are Necessary To Remove A Tire?
To remove a tire, you’ll need tire irons or spoons, a valve core remover, a bead breaker, and an air compressor. High-quality tools make the job easier and prevent damage to the rim and tire.
How Do I Safely Deflate A Tire For Removal?
Begin by removing the valve cap, using a valve core removal tool to extract the core, and allowing the air to escape completely. Always stand clear of the trajectory path of the air to ensure safety.
What Is The Proper Technique To Break The Bead?
Place the bead breaker between the tire and the rim. Apply force to pry the tire bead away from the rim. Do it steadily and walk the breaker around the rim to avoid damaging the wheel.
Conclusion
Removing a tire from its rim can be a straightforward process with the right tools and steps. Remember, safety comes first, so wear protective gear. With practice, you’ll master this skill, saving time and money. For more automotive tips, keep following our blog.
Drive safely and stay informed!

Sudatta is a passionate automotive enthusiast and expert in the field. With a keen eye for detail and a love for all things automotive, he shares insightful articles and reviews to ignite the automotive passion in readers.