Learn how to install dash cam effortlessly with our step-by-step guide. Enhance your vehicle’s safety and security in no time!
Dash cams have become essential for modern drivers, offering an extra layer of security and accountability while navigating the roads. Installation is straightforward and begins by finding the perfect spot on your windshield or dashboard to ensure maximum coverage and minimal obstruction.
Connecting your dash cam to a power source, typically through the cigarette lighter or via hardwiring, will complete the setup. It’s vital to route cables neatly to avoid interference with driving controls or visibility.
By taking these steps, you can protect yourself with a reliable eyewitness on all your journeys. Remember, a well-installed dash cam not only provides peace of mind but also can be crucial in the event of an incident on the road.

Credit: www.youtube.com
Introduction To Dash Cams
Dash cams, or dashboard cameras, have surged in popularity. These small devices attach to your car’s windshield. They record your drives. Think of them like a GoPro for your car. They provide a video log of your journeys.
Rise In Popularity
Dash cams are now a common sight in vehicles worldwide. Their growth in the market is impressive. Several factors contribute to this trend:
- Increase in road traffic
- Enhanced awareness of road safety
- Need for evidence in insurance claims
Benefits For Drivers
Drivers enjoy many advantages with dash cams:
- Sharp eyes on the road, even at night
- Faster insurance claims with video proof
- Check on car when parked
| Benefit | Description |
|---|---|
| Security | Records theft or damage |
| Peace of Mind | Watching over your vehicle 24/7 |
| Trip Recording | Captures memories on the road |
Selecting The Right Dash Cam
Choosing a dash cam can be tricky. With so many options, finding the perfect fit for your car requires some know-how. Key features, brand reputation, and price all come into play. This guide helps pinpoint what matters most in a dash cam.
Key Features To Look For
Dash cams come with various features. Focus on these essentials:
- Resolution: The higher, the clearer the footage.
- Night Vision: Ensures quality video even at night.
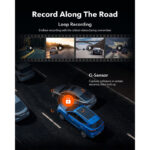
- Loop Recording: Overwrites old files, saving space.
- G-Sensors: Detects impacts, securing crucial clips.
- Parking Mode: Monitors your car when parked.
Comparing Brands And Prices
Cost and quality often correlate, but deals exist. Assess features against price:
| Brand | Key Features | Price Range |
|---|---|---|
| Brand A | 1080p, Night Vision, GPS | $50 – $100 |
| Brand B | 4K, Wi-Fi Connectivity, G-Sensor | $150 – $200 |
| Brand C | FHD, Loop Recording, Parking Mode | $100 – $150 |
Read reviews and watch unboxing videos. They provide insight beyond specs and prices.
Tools And Materials Required
Before you start your dash cam installation adventure, make sure you have the right tools and materials. Collecting them now will save you time. Let’s go over what you’ll need to make this installation smooth and worry-free.
Basic Tool Kit
A basic tool kit is essential for a successful dash cam install. These items help you fix the dash cam in place. You will use them to hide wires neatly. Look below to see what’s in this kit:
- Screwdrivers – for screws and pry open panels
- Trim Tool – to gently remove interior trims
- Wire Cutters/Strippers – to manage wires
Additional Installation Supplies
Some more supplies will come in handy. These are not in a basic tool kit. They will help you attach the dash cam and manage the cables. Find out more about these supplies:
- Electrical Tape – to secure connections
- Cable Ties – for tidy wire management
- Fuse Tap – to connect to the car’s power source
- Memory Card – to store footage from the cam
Credit: www.grdian.com
Pre-installation Steps
Before diving into mounting your new dash cam, it’s crucial to prepare. Proper pre-installation helps secure optimal performance and footage clarity. Follow these preliminary steps to ensure a smooth installation process.
Choosing The Camera Position
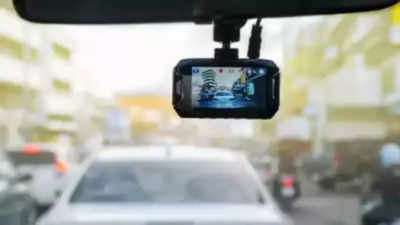
Selecting the right spot for your camera is key. Aim for minimal obstruction. Remember, the law forbids blocking the driver’s view. Most drivers prefer the area behind the rearview mirror. This location offers a wide view and stays out of the driver’s line of sight.
Cleaning The Mounting Area
A clean mounting area ensures the camera stays put. Use an alcohol pad or a mix of water and vinegar to wipe down the windshield area. Dry it fully before proceeding. Now, you’re ready to mount the camera for the best recording angle.
Don’t forget:
- Check your state laws regarding windshield obstructions
- Assess the sun’s angle to avoid lens flare
- Plan for cable routing to maintain a neat setup
Mounting The Dash Cam
Mounting the Dash Cam ensures your journey’s visual record. Precise placement leads to clear footage, increasing safety and accountability. Let’s dive into the best practices for installation.
Attaching The Camera Mount
- Find the ideal spot on the windshield for the mount.
- Clean the area with an alcohol wipe to ensure a strong adhesion.
- Remove the protective film from the adhesive pad on the mount.
- Press the mount firmly against the windshield for about 30 seconds.
- Wait a few minutes for the adhesive to bond before attaching the dash cam.
Securing The Dash Cam
Once the mount adheres, it’s time to secure the dash cam. Here’s how:
- Slide the dash cam onto the mount until it clicks into place.
- Adjust the camera angle to capture the best view of the road.
- Tighten any screws or clips to prevent the cam from shifting.
- Connect the power cable to the dash cam and route it neatly.
- Use cable clips or adhesive mounts to keep the cable out of sight.
Proper installation ensures your dash cam captures every detail.
Connecting To Power
Connecting to Power is a crucial step in installing your dash cam. A reliable power connection ensures your dash cam functions correctly. Let’s explore how to power your dash cam seamlessly.
Wiring Options
Several wiring options are available for your dash cam:
- 12V Car Charger: Plug into your car’s cigarette lighter.
- Hardwiring Kit: Connect to the car’s fuse box.
- Battery Pack: An external power source.
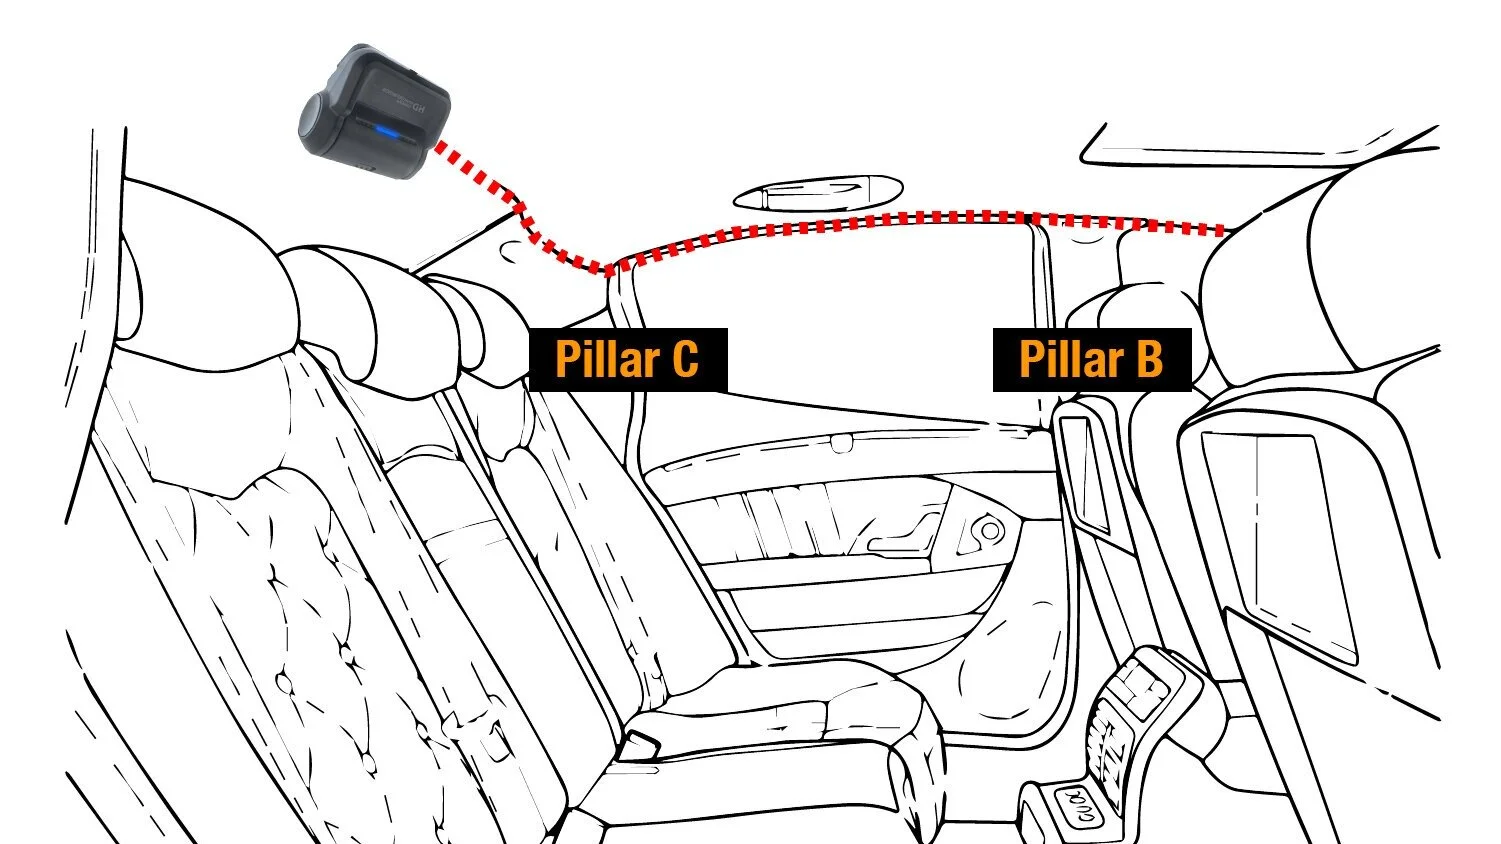
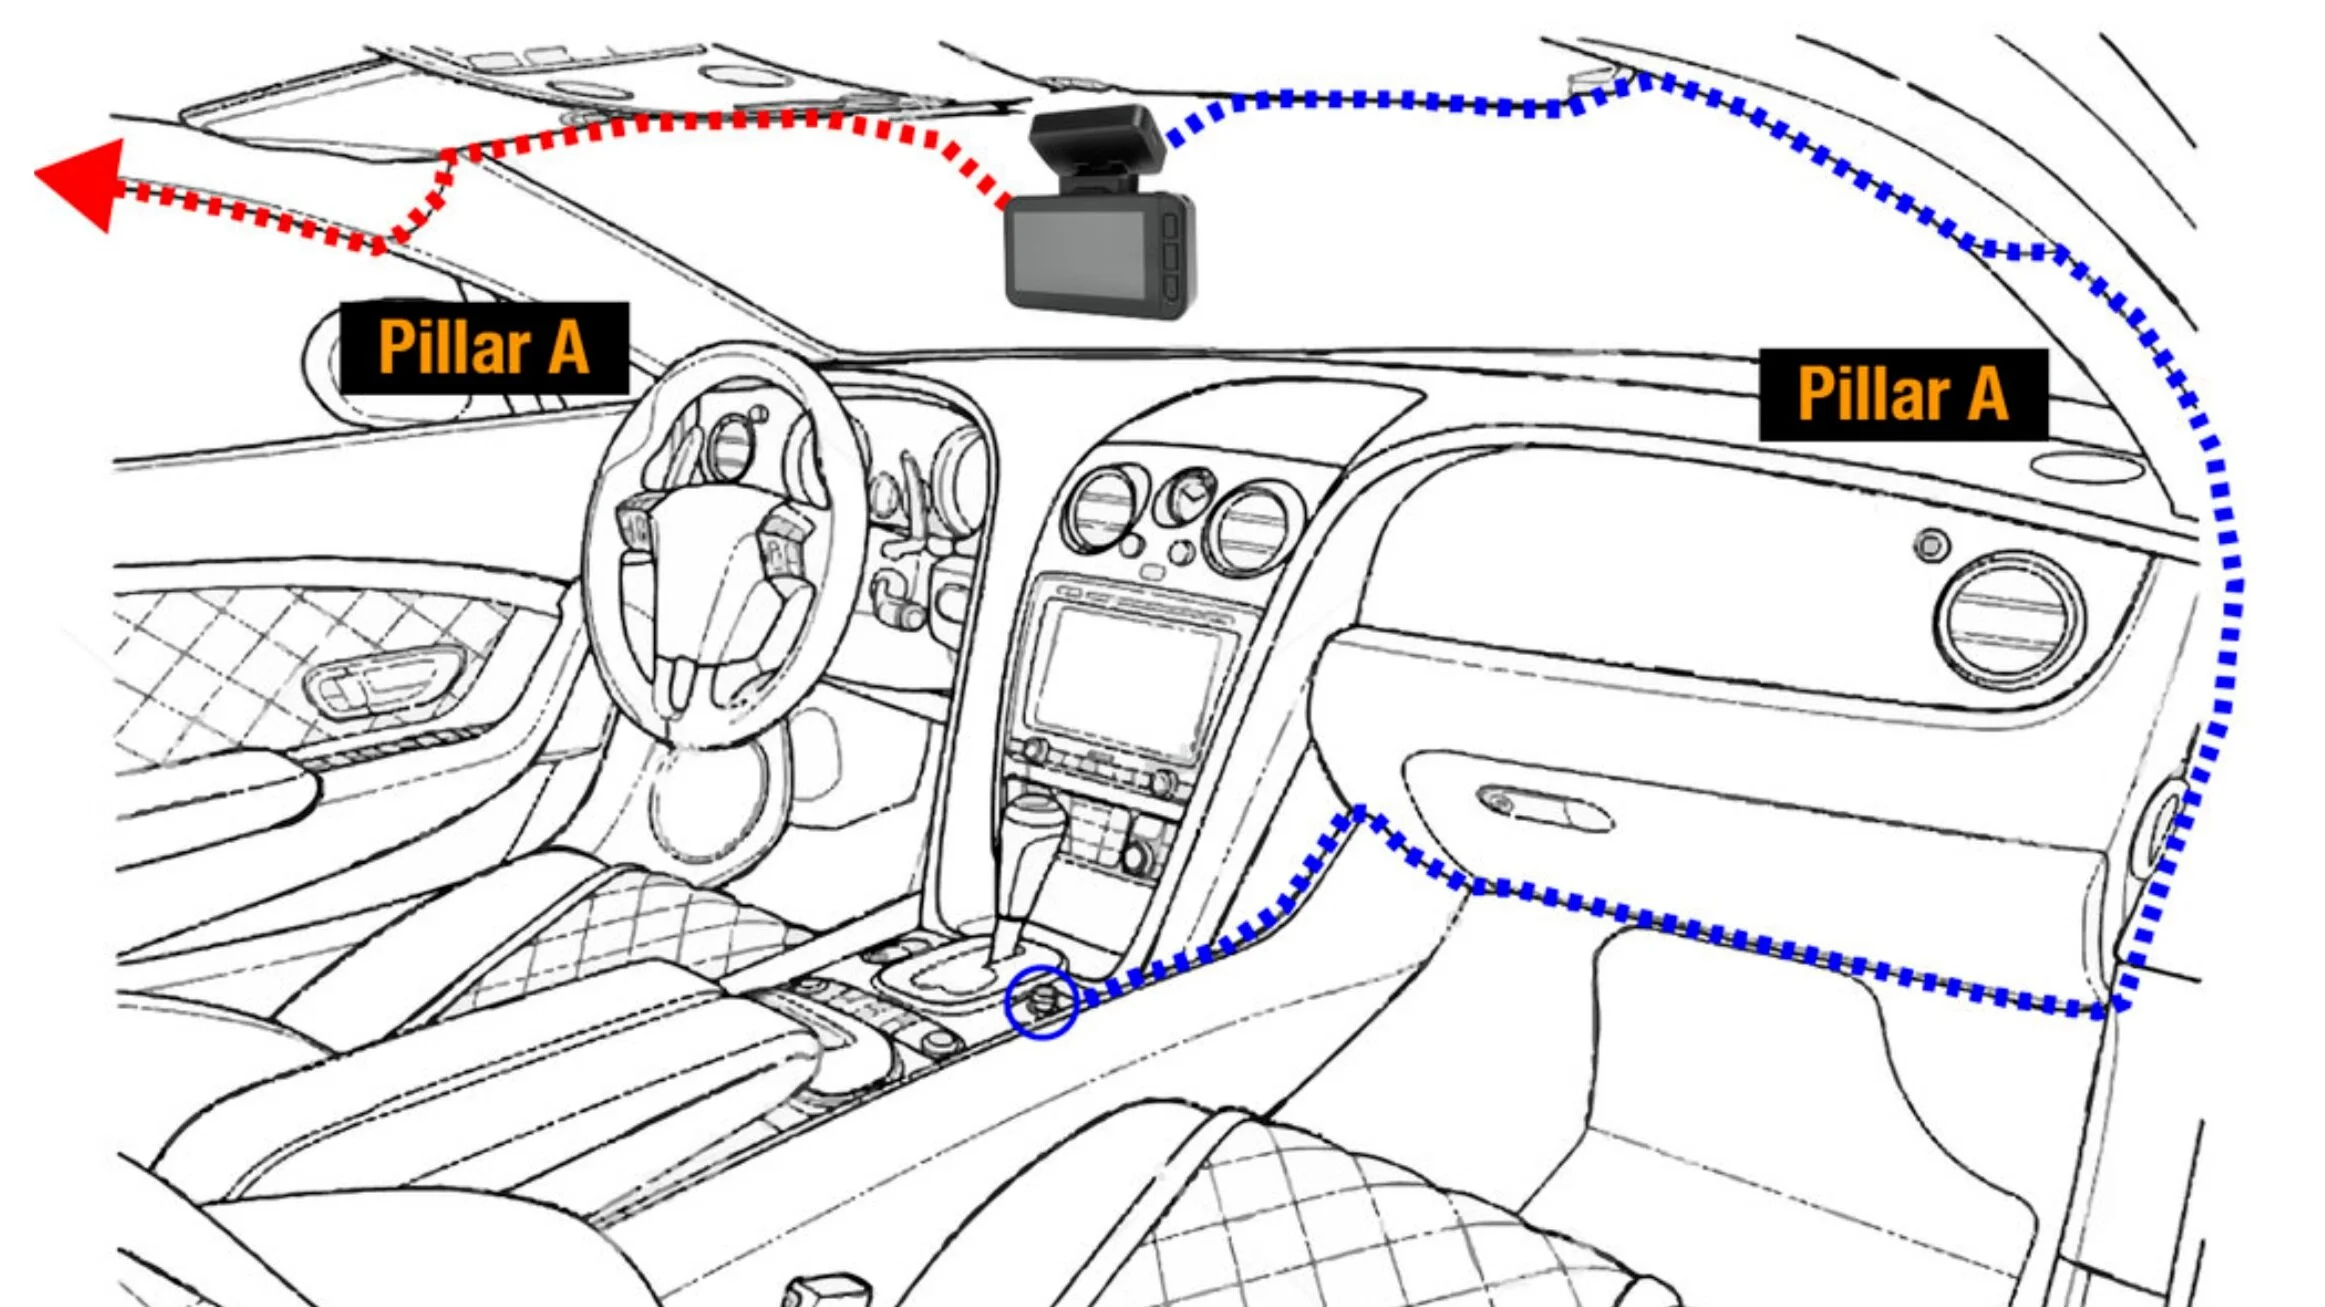
Hiding The Power Cable
Hiding the power cable can keep your car neat:
- Run the cable along the windshield edge.
- Use trim tools to tuck the cable into headliner.
- Guide the cable down the A-pillar and to the power source.
Ensure the cable does not obstruct airbags.
Configuring The Dash Cam Settings
After installing your dash cam, fine-tuning the settings ensures optimal performance. High-quality footage and useful features distinguish the best dash cam experiences from the rest. Dive into the settings to get the most out of your device.
Adjusting Video Quality
Crystal-clear video is vital for capturing details like license plates and street signs.
Most dash cams offer a range of video resolutions. Start by accessing the video settings menu on your dash cam. Select the highest resolution, typically 1080p or 4K, for top-notch clarity.
- Resolution: Choose 1080p or higher
- Frame Rate: 30fps is standard; 60fps for smoother footage
- Field of View: Wider angles cover more area
Remember, higher video quality may require more storage space.
Setting Up Features
Enable key features to enhance dash cam functionality.
| Feature | Description | How to Enable |
|---|---|---|
| Loop Recording | Overwrites oldest files for continuous recording | Toggle on in settings |
| Motion Detection | Records when motion is sensed | Look for ‘Motion Detection’ and activate |
| G-Sensor | Saves footage upon impact | Set sensitivity in ‘G-Sensor’ settings |
Explore additional features like GPS tracking and Wi-Fi connectivity depending on your model. Some models offer advanced driver assistance features (ADAS) like lane departure warnings. Always save settings changes before exiting.
Final Checks And Maintenance
Installing a dash cam ensures safety and legal protection on the road. But don’t sign off on the job just yet. First, confirm everything works correctly.
Next, let’s set up a maintenance routine to keep your device in top condition over time. Proper care means long-term reliability.
Testing The Installation
Fire up your dash cam after installation. Check the following:
- Does it power on when the car starts?
- Is the recording smooth and clear?
- Can you view the footage on another device?
- Are all mounting points secure?
- Do cables stay out of the driver’s way?
Fix any issues right away. This ensures your dash cam records every trip perfectly.
Regular Upkeep Tips
Maintain your dash cam with these simple steps:
- Regularly clean the lens for clear footage.
- Check for firmware updates.
- Verify the memory card functions and has enough space.
- Recheck the mount stability bi-monthly.
- Backup important videos elsewhere.
These actions will help your dash cam last longer. They also ensure it works well when you need it most.
Credit: www.grdian.com
Frequently Asked Questions For How To Install Dash Cam
How Do You Attach A Dash Cam To Your Car?
To attach a dash cam to your car, first clean the windshield area. Then, remove the adhesive backing from the camera mount and press it firmly against the glass. Secure the device onto the mount, and route the power cable to the cigarette lighter or USB port for power.
Can You Get A Dash Cam Without Wires?
Yes, wireless dash cams are available which operate on battery power or utilize your vehicle’s existing power sources.
How Much Does It Cost To Install A Dash Cam?
The cost to install a dash cam typically ranges from $35 to $200, depending on the camera’s complexity and installation requirements.
Do Dashcams Need To Be Plugged In?
Dashcams typically require power and are often plugged into a vehicle’s 12V socket. Some models feature internal batteries for short-term use unconnected.
Conclusion
Installing a dash cam need not be daunting. By following the steps we’ve laid out, you’re now equipped to take on this simple DIY project. Secure driving is paramount, and your new dash cam is a smart step toward that goal.
Remember, regular checks will ensure it keeps recording all your journeys. Drive safe and stay secure!

Sudatta is a passionate automotive enthusiast and expert in the field. With a keen eye for detail and a love for all things automotive, he shares insightful articles and reviews to ignite the automotive passion in readers.