How to make car seat covers, measure your seats at first, and choose a durable fabric. Cut the material to size, and sew it together, creating a customized fit.
Creating your car seat covers is a straightforward process that can add a personal touch to your vehicle’s interior. It’s an opportunity to protect your car seats from daily wear and tear while showcasing your personal style.
Whether you’re a seasoned DIY enthusiast or a beginner, making seat covers at home requires some basic sewing skills and the right materials.
With a tape measure, some fabric, and a sewing machine, you can design seat covers that not only look great but also save you money compared to purchasing pre-made options. It’s an engaging project that can enhance the comfort and appearance of your car, giving it a fresh and unique feel.

Credit: m.youtube.com
The Drive To Diy: Custom Car Seat Covers
Creating custom car seat covers is a fun way to add a personal touch to your vehicle. It’s a crafty adventure that lets you choose your favorite fabrics and designs. Whether you aim for comfort, protection, or style, the journey to DIY car seat covers is rewarding. Let’s get started on how to give your car a fresh, personalized look!
Benefits Of Personalizing Your Car Seats
Personalizing car seats comes with many perks:
- Unique style: Stand out with a one-of-a-kind design.
- Comfort: Use materials that feel good on long drives.
- Protection: Keep the original seats clean and new.
- Resale value: Well-maintained interiors can boost car value.
Essential Tools And Materials
To start crafting your car seat covers, gather these items:
| Tools | Materials |
|---|---|
| Measuring tape | Durable fabric |
| Scissors | Flexible foam |
| Sewing machine | Thread |
| Fabric marker | Velcro or straps |
Design Selection: Choosing The Right Fabric And Style
Making your own car seat covers is a perfect way to give your car a personal touch. Design selection plays a crucial role in this process. The right choice of fabric and style not only adds aesthetic appeal but also ensures durability and comfort. Let’s take a closer look at how to select the best materials for your car seat covers.
Assessing Fabric Durability And Comfort
When selecting fabric, durability and comfort are key. The material should withstand regular use and be pleasant to sit on. Consider these factors:
- Thickness and weave: A tight weave means more durability.
- Material type: Leather, canvas, and neoprene are tough choices.
- Resistance: Look for water, stain, and fade resistance.
Touch and test various fabrics to ensure they are soft yet resilient.
Color And Pattern Considerations
Color and pattern have a big impact on your car’s interior. Think about these points:
- Choose colors that match your car’s interior.
- Bold patterns make a statement but can be overpowering.
- Neutral colors offer a timeless look and hide dirt well.
Remember, light colors might require more cleaning. Choose a design that you will enjoy every day!
Measuring Twice: Preparing Your Car Seats For A Perfect Fit
Getting the perfect fit for your DIY car seat covers starts with precise measurements. Think of it as tailoring a suit; every inch counts for that custom-fit look.
An accurate template ensures not just aesthetic appeal but also comfort and durability. Let’s dive into creating a flawless template that caters to every curve and feature of your car seats!
Creating A Template For Your Seats
Crafting a template is a critical step in making car seat covers. A template acts as a roadmap, guiding your fabric cuts. Follow these instructions for the best results:
- Use butcher paper or newspaper to cover the entire seat. Make sure to press down into crevices.
- Trace the shape of the seat with a marker, including all curves and edges.
- Label each part of your template. For example, “driver’s side backrest.”
- Include tabs on your template for areas where seams will be needed.
Adjustments For Unique Seat Features
Seats are not one-size-fits-all; they come with unique elements. Make allowances for these features for a snug fit:
| Seat Feature | Adjustment Required |
|---|---|
| Headrests | Include openings or straps. |
| Armrests | Create separate covers or slits. |
| Built-in Seatbelts | Mark locations for belt pathways. |
| Controls | Leave space for movement and access. |
Remember to add extra material to your measurements for seam allowances. Also, account for any stretch in your chosen fabric. A mock-up with inexpensive fabric can save time and material in the long run.
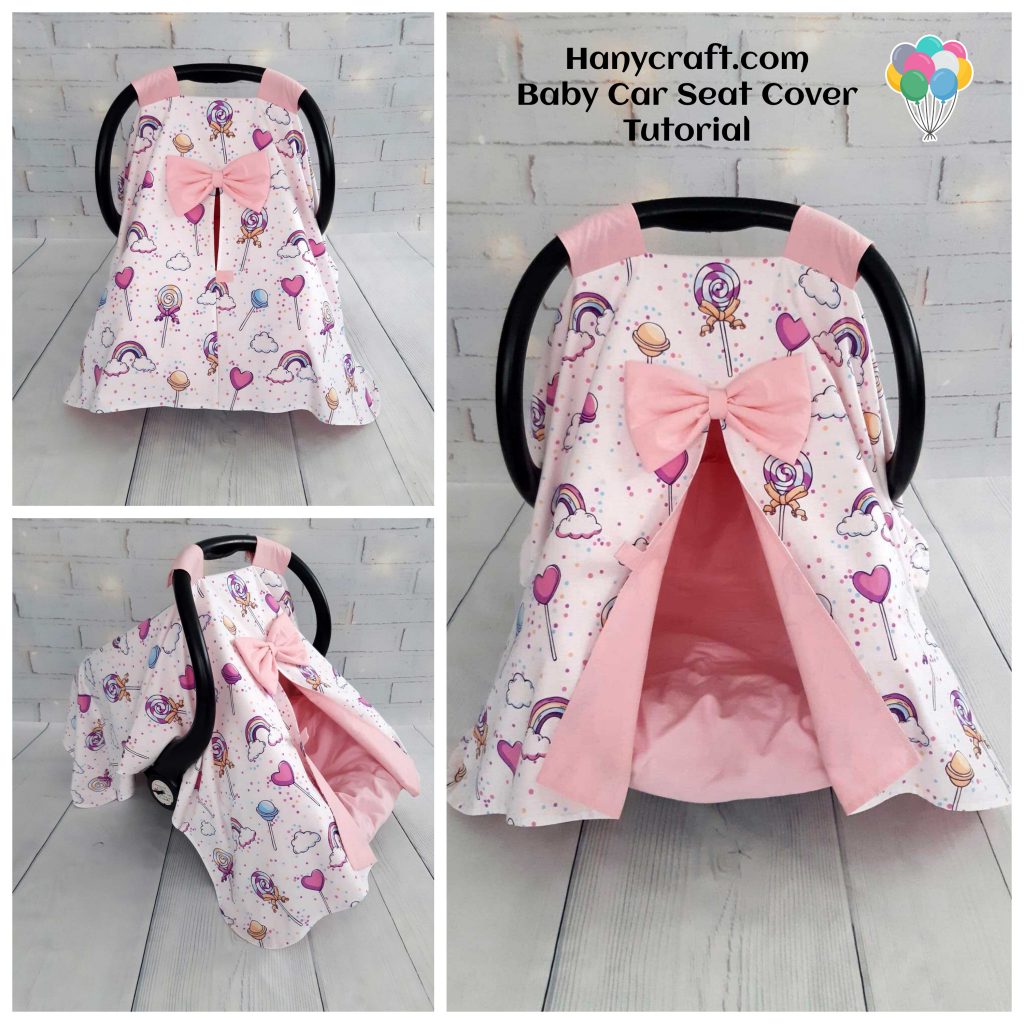
Credit: hanycraft.com
Cutting The Cloth: Getting The Pieces Ready
Embarking on a DIY car seat cover project? The initial step involves cutting the fabric to fit your car seats precisely. Begin by selecting a durable, comfortable fabric.
Measure your car seats and add a few inches to each dimension for a snug fit. This allows room for stitching and potential errors. Now, let’s guide you through the process of preparing your fabric pieces with precision.
Tips For Accurate Fabric Cutting
- Choose the Right Tools: A sharp fabric scissors or a rotary cutter ensures clean cuts.
- Use a Cutting Mat: Protect your surfaces and enhance cutting accuracy.
- Measure Twice, Cut Once: Double-check dimensions to avoid mistakes.
- Flat Surface: Lay fabric on a flat area to ensure even cuts.
- Prioritize Safety: Be mindful of fingers and fabric placement to prevent accidents.
Labeling Parts To Avoid Confusion
Organization is key when making car seat covers. Label each piece of fabric immediately after cutting. Use tags or masking tape with indications such as ‘front left’, ‘headrest’, or ‘armrest’. This saves time and keeps you on track.
Sewing The Seats: Stitching Your Way To Comfort
Embarking on a DIY journey to create custom car seat covers can transform the interior of your vehicle. Sewing the seats brings a touch of personal flair and enhanced comfort to your car. The right fabric and a careful stitching process ensure seat covers not only fit perfectly but also stand the test of time.
Assembling The Pieces
Start by laying out the fabric you’ve chosen on a flat surface. Cut the material according to the pattern you’ve prepped based on your seat measurements. Assemble all pieces before you commence the sewing process. This ensures a smooth workflow.
- Front and back pieces for each seat cover
- Armrests, headrests, and accessory sections
- Straps or ties for securing the covers
Choosing The Right Stitch For Durability
Selecting a sturdy stitch is crucial for seat cover durability. A zigzag or overlock stitch prevents fraying and withstands daily wear and tear. Use a strong, upholstery-grade thread to ensure long-lasting seams. Work through these steps:
- Set your sewing machine to the desired stitch setting.
- Test the stitch on a fabric scrap to ensure tension and width are correct.
- Sew the pieces together, starting from the center and working outward.
- Double-stitch at the start and end of each seam for extra strength.
Regularly check and adjust the thread tension, especially when tackling thicker fabrics or multiple layers.
| Fabric Type | Stitch Type | Machine Setting | Notes |
|---|---|---|---|
| Cotton | Zigzag | Medium Tension | Standard for most car interiors |
| Vinyl/Leather | Triple Stitch | High Tension | Ensure needle is suitable for thick fabrics |
| Stretch Material | Overlock | Medium to High Tension | Stretch with fabric while sewing |
Adding The Finishing Touches: Elastic And Straps
Adding the Finishing Touches: Elastic and Straps turn a simple car seat cover into a perfectly fitted accessory. These final steps keep covers snug and secure, even during long, bumpy rides. Let’s explore how to expertly apply elastic and straps to your car seat covers.
Securing The Covers With Elastic Bands
Elastic bands give your seat covers a tailored fit. They cling to the underside of seats, preventing slippage. Here’s a step-by-step guide:
- Measure the seat’s base to determine elastic length.
- Cut elastic slightly shorter than the measured length.
- Sew the ends to your seat cover’s hem, stretching as you stitch.
- Repeat for both front and back sections of the seat cover.
Attaching Straps For Additional Support
Straps ensure covers stay in place, even with constant use. This part focuses on sturdy, adjustable straps:
- Choose heavy-duty straps for durability.
- Cut to the needed length, adding a bit extra for adjustments.
- Attach one end of the strap to the seat cover’s side edge.
- Loop around the seat and secure the other end.
- Add buckles or Velcro for adjustability and easy removal.
Ensure that all straps are symmetrically placed for an even look. Now, your car seat covers are fully prepared to offer style and protection!
The Fitting Session: Installing Your Customized Seat Covers
Installing custom seat covers can transform your car’s interior. Get your tools ready and follow this guide. A snug fit makes for the ultimate upgrade. This part is crucial for a fantastic result. Let’s get right to it!
Step-by-step Installation Guide
- Remove the headrests and organize them.
- Slide the seat cover over the top of the seat. Use straps and buckles underneath to secure it.
- Align the seat cover so the seams match the seat’s contours. This ensures a smooth fit.
- Once aligned, smooth out the material to prevent wrinkles.
- Tuck in the fabric into sides and back. This creates a tailored look.
- Replace the headrests and cover them too.
Troubleshooting Common Fit Issues
- If the seat cover is too tight, warm it up. Use a hairdryer to make it flexible.
- For a loose fit, adjust the straps. Pull them tighter for a snug feel.
- Wrinkles? Remove the cover and smoothen again. A crease-free cover looks best.
- Check your model. Some cars need specific cover types.
- Still wrong? Measure your seats again. The right size is key to a perfect fit.
Credit: m.youtube.com
Care And Maintenance: Prolonging The Life Of Your Seat Covers
Custom car seat covers add flair and protection to your vehicle’s interior. Like any investment, keeping seat covers in top shape is crucial. Regular care ensures they look and perform well for years. We’ll share how to keep fabric seat covers clean and how to fix any damage they might get over time.
Cleaning Tips For Fabric Seat Covers
To maintain the fresh look of fabric seat covers, cleaning them properly is key. Here’s a simple guide:
- Vacuum: Remove loose dirt with a vacuum cleaner regularly.
- Spot Clean: Treat spills and stains immediately using mild soap and water.
- Machine Wash: If possible, machine wash covers on a gentle cycle with cool water.
- Air Dry: Always let covers air dry to prevent shrinking.
For stubborn stains, consider a fabric cleaner designed for automotive use. Remember to test it on a small area first to ensure no discoloration or damage happens.
Repairing Wear And Tear
Even with the best care, seat covers might show signs of wear over time. Don’t worry! You can fix minor issues easily to extend their lifespan.
- Small Tears: Sew up any small tears with matching thread.
- Patches: Use fabric patches for larger areas of damage. Ensure the patch blends well with the original material.
- Professional Help: For extensive damage, seek professional upholstery services.
Regular inspections: Check covers for signs of wear during cleaning. Early detection makes repairs simpler and less noticeable.
Upgrading Your Creation: Additional Customization Ideas
Once you’ve mastered the basic steps for making a car seat cover, why stop there? To really make your project stand out, consider adding your own personal touch!
Customizing your car seat covers can be both fun and functional. Explore these customization ideas to create something truly unique.
Incorporating Pockets And Holders
Pockets and holders add practicality while enhancing the design of your car seat covers. They’re perfect for storing gadgets, snacks, or small items you want to keep close while driving. Here are easy ways to incorporate them:
- Decide on the size and number of pockets.
- Choose the right fabric that’s sturdy and durable.
- Cut the fabric pieces to match your pocket design.
- Sew the pockets on your base cover with strong stitches.
Think about your daily needs and design pockets that hold your essentials. With these added features, your car seat covers will be both stylish and functional.
Embracing Embroidery And Appliqués
Add a personal flair to your car seat covers with embroidery and appliqués. These artistic details can bring a splash of color and texture, setting your covers apart. Follow these tips:
- Select a design or pattern that reflects your personality.
- Select threads or fabrics that contrast well with your base cover.
- Sew or iron-on your designs securely to prevent fraying.
Embroidery and appliqués make your car seat covers truly one-of-a-kind. They show off your crafting skills and your stylish taste, every time you hit the road.
Showcasing Your Work: Sharing Your Diy Success
After the final stitch, it’s time to show the world your custom car seat covers! Presenting your DIY achievement can spark inspiration and admiration.
Sharing your journey helps foster a community of creative enthusiasts. Ready to flaunt your masterpiece?
Taking The Best Photos Of Your Car Seat Covers
Visuals capture attention. Quality photos highlight your craft. Follow these tips:
- Use natural light for clarity and vivid colors.
- Position your car away from distractions for a clean background.
- Take multiple angles to showcase the full design.
With your smartphone or camera, capture the essence of your handiwork. Edit for brightness and contrast. Remember, a picture speaks a thousand words!
Using Social Media To Inspire Others
Social platforms are your stage. They connect like-minded DIYers. Use these tips:
- Post your photos on Instagram, Pinterest, and Facebook.
- Write a captivating caption. Encourage engagement.
- Tag your images with #DIYCarSeatCovers to reach more viewers.
- Reply to comments and spark conversations.
Your work could motivate a trend. Share your project stages and the final result. Your artistry could go viral!
Frequently Asked Questions On How To Make Car Seat Covers
Can You Make Car Seat Covers?
Yes, we offer custom-made car seat covers tailored to your vehicle’s specific make and model for a perfect fit.
What Is The Best Fabric To Cover Car Seats?
The best fabric for car seat covers is neoprene, known for its durability, comfort, and resistance to water and UV rays. Polyester and leather are also popular for their easy maintenance and aesthetic appeal.
What Fabric Is Used For Seat Covers?
Seat covers are typically made from materials like leather, faux leather, neoprene, canvas, and polyester. Each fabric offers different levels of durability, comfort, and style.
How Many Yards Of Fabric Do I Need To Make A Car Seat Cover?
To make a car seat cover, you typically need about 2 to 3 yards of fabric, depending on the size and style of the seat.
Conclusion
Creating your own car seat covers is both a practical and rewarding project. It allows for personalization while protecting your vehicle’s interior. With the right materials and a bit of patience, anyone can produce professional-looking seat covers.
Embrace this DIY challenge and enjoy the satisfaction of a customized car interior that reflects your style.

Sudatta is a passionate automotive enthusiast and expert in the field. With a keen eye for detail and a love for all things automotive, he shares insightful articles and reviews to ignite the automotive passion in readers.